How to Reduce Cart Abandonment Using an Exit Intent Popup
By
|
Last updated on
Do you want to lower your cart abandonment rate on your website’s payment forms?
Cart abandonment (or checkout abandonment) is when a visitor to your site starts filling out your payment form but then leaves your site before they’ve completed their purchase. The Baymard Institute estimates that the average cart abandonment rate for eCommerce stores is 69.82%.
The good news is that you can easily add an exit intent popup to your checkout page, start recovering some of these abandoned checkouts, and boost your sales!
How Exit Intent Popups Work
An exit intent popup will appear to a site visitor when they’re about to exit the page. This is detected when they move their mouse outside the browser window to navigate to a new site or close the tab.
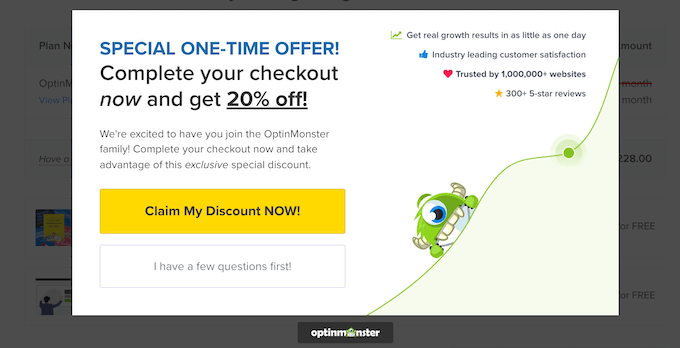
So why are potential customers abandoning their purchase after visiting or even starting to fill out a payment form?
Maybe they need more details about your product or service and have a few unanswered questions. Perhaps they’re simply unsure if the value that they’ll receive will be worth the cost.
With an exit intent popup that addresses one or both of these issues, you can expect to recover 3% to 8% of your visitors that would otherwise be leaving your payment forms.
Fortunately, it’s pretty straightforward to create an exit intent popup that does just this on your WordPress site.
For this tutorial, we’ll show you how to add an exit intent popup to a WP Simple Pay payment form on a WordPress site using the OptinMonster plugin.
Alternatively, you could use OptinMonster on a site running a full-featured shopping cart plugin like Easy Digital Downloads or WooCommerce if that better fits your needs.
Let’s get started.
Table of Contents
- Step 1: Install and Connect OptinMonster
- Step 2: Create an Exit Intent Popup Campaign
- Step 3: Set Up a WP Simple Pay Payment Form
- Step 4: Add a Coupon Code to WP Simple Pay and Stripe
- Step 5: Add the Payment Form and Exit Intent to a Page
Step 1: Install and Connect OptinMonster
First, you’ll want to install the OptinMonster plugin on your website. In your WordPress dashboard, select Plugins » Add New, then search for OptinMonster.
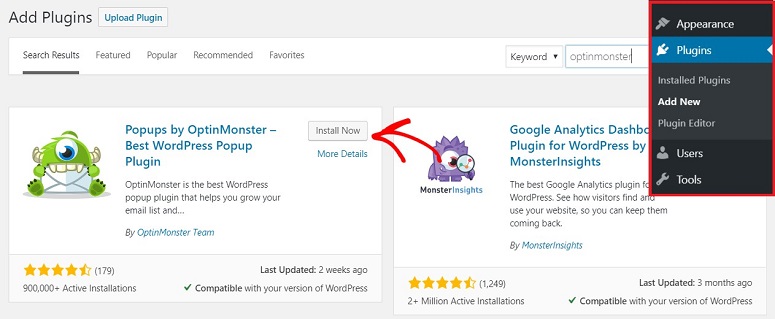
Once you find the OptinMonster plugin, click Install Now, then click Activate.
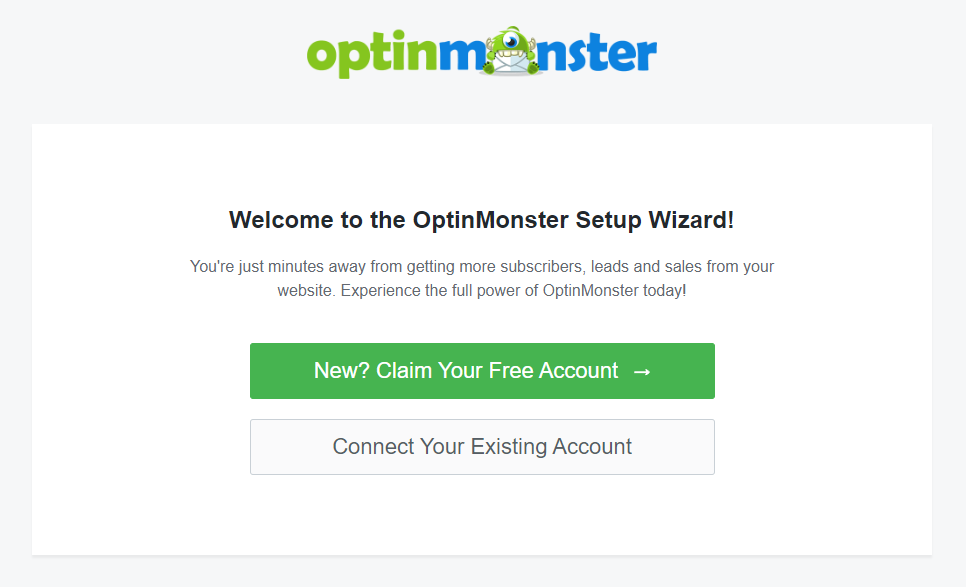
After you’ve activated the plugin an OptinMonster setup wizard should appear.
If you don’t see the setup wizard, just click OptinMonster in the left side navigation, then click Launch the Setup Wizard.
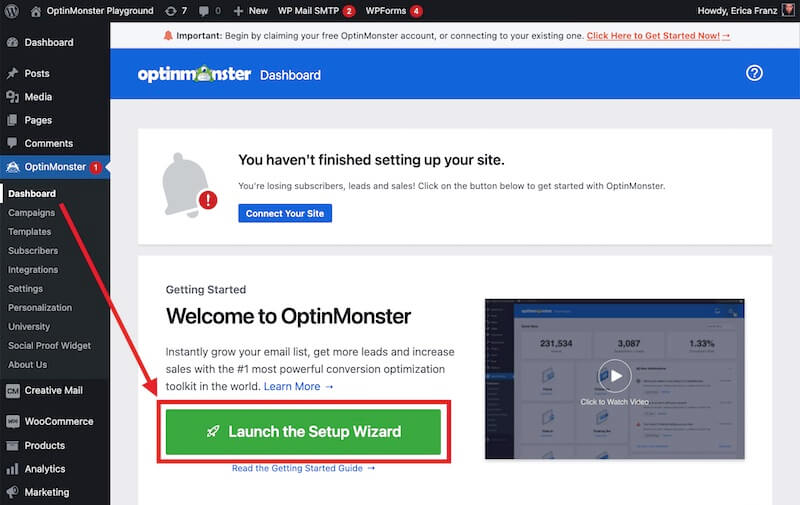
At this point, switch over to a new browser tab, visit OptinMonster.com, and purchase either the Pro or the Growth plan so that you can use the exit intent feature.
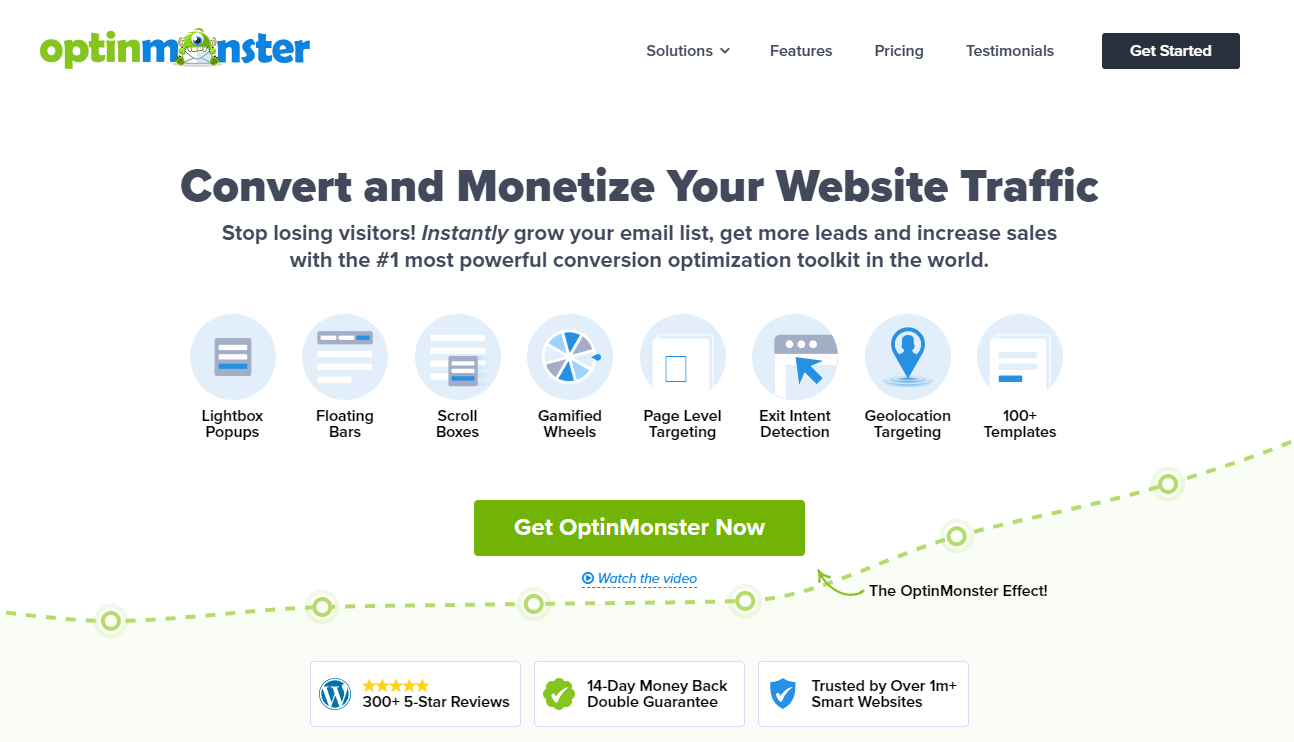
Once your account is created, you can connect it with the WordPress plugin that you have just installed.
Back in your WordPress dashboard, with the OptinMonster setup wizard open, simply click Connect Your Existing Account and proceed through the steps.
For more details and assistance with setting up OptinMonster, check out the OptinMonster step-by-step installation guide.
Step 2: Create an Exit Intent Popup Campaign
Within the exit intent popup itself is where you’ll want to give your potential customer an incentive to complete their purchase. So for this example, we’ll create a popup that includes a coupon code.
At the end of the OptinMonster setup wizard, click Create Your First Campaign. Alternatively, you can select OptinMonster » Campaigns, then Add New in the left-hand menu.
Here select the Popup campaign type.

Next, choose a template from the available options. We’re going to search for “coupon” and select the Coupon template in this walkthrough, but you could choose any template that appeals to you as they’re all very simple to modify.

Now you’ll be prompted to name your campaign and start editing the popup design. You’ll see many customization tools on the left-hand side. As you edit your campaign, you’ll see a live preview on the right-hand side much like the WordPress theme customizer.
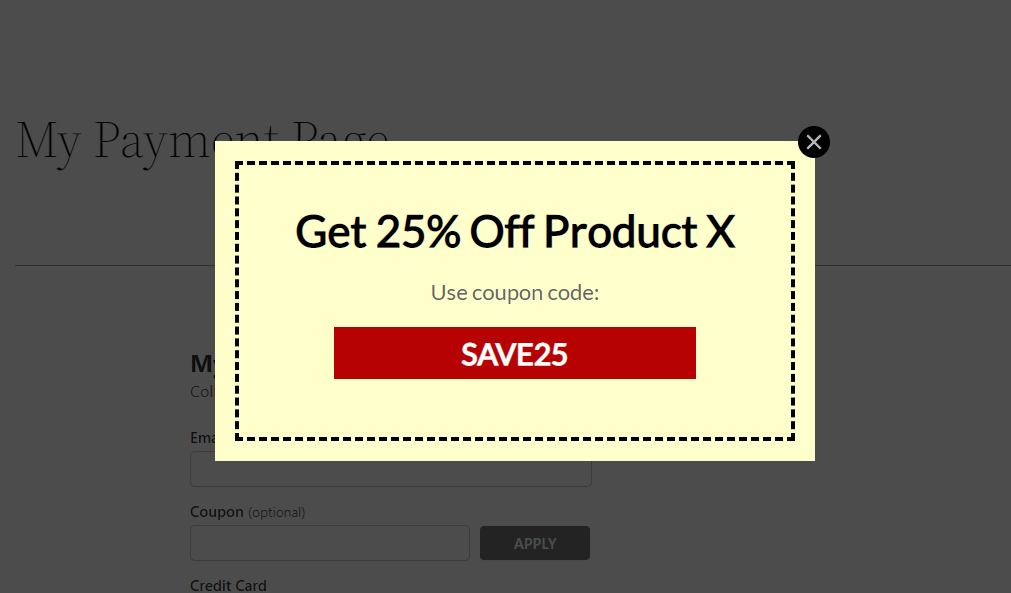
In this example, remove some elements and add text that contains the coupon code SAVE25 for 25% off as we’ll be adding this coupon to our payment form later on. It should end up looking similar to the following:
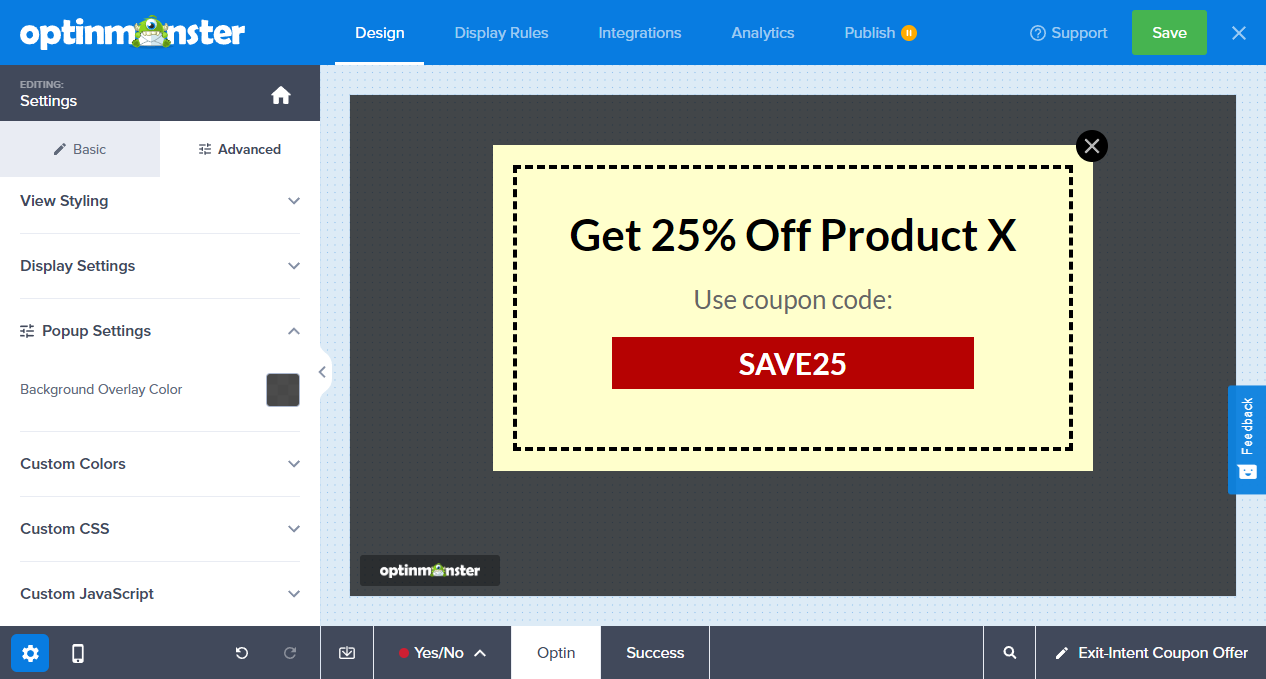
When you like how it looks, click Save.
For more help designing your first campaign, visit OptinMonster’s Creating Your First Campaign guide.
Step 3: Set Up a WP Simple Pay Payment Form
In this guide, we’ll be creating a payment form using WP Simple Pay to add an exit intent popup to. If you prefer you can also just as easily modify a payment form that you’ve created previously.
If you’re new to WP Simple Pay you’ll need to purchase a Pro license to follow along. Once purchased, a wizard will walk you through the first-time setup, but if you need more help, you can simply follow the WP Simple Pay step-by-step installation guide.
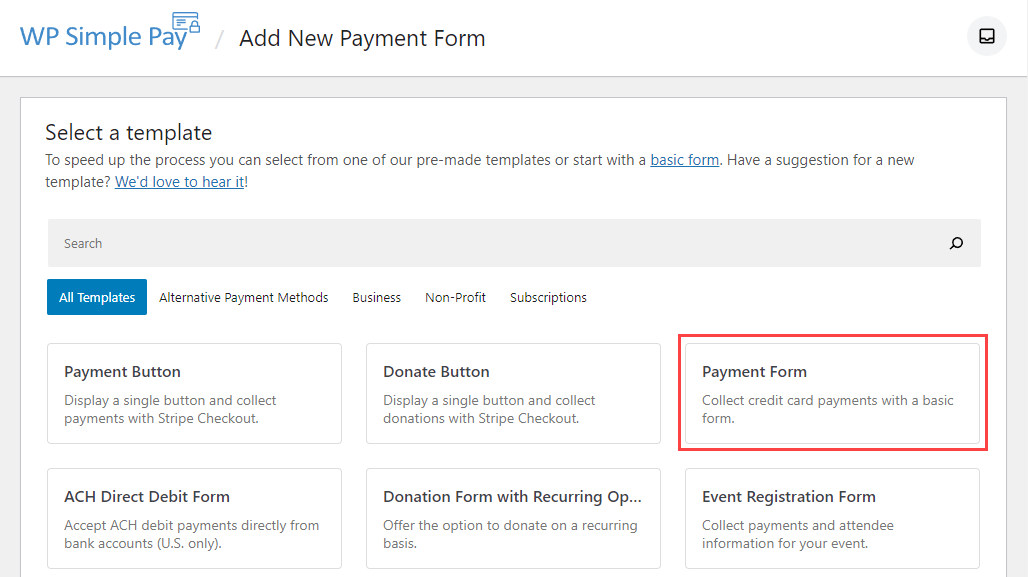
To create a payment form in your WordPress dashboard, select WP Simple Pay » Add New, then select the Payment Form template.
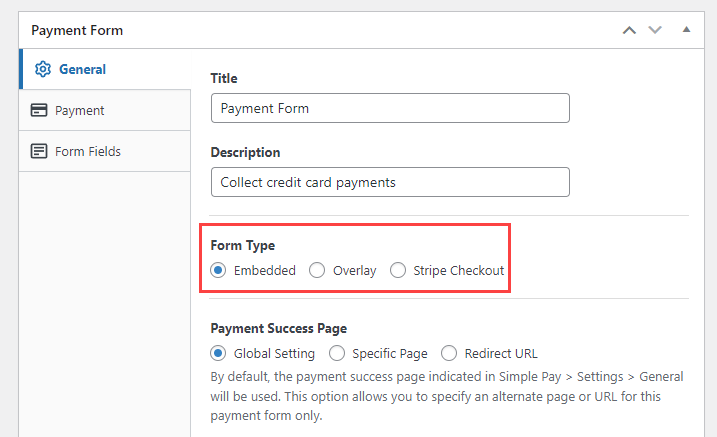
If you’re editing an existing payment form, make sure the form type is set to Embedded. The “Overlay” form type is a popup itself, so it won’t work well with an exit intent popup. The “Stripe Checkout” form type redirects you to a payment form on Stripe’s servers, so that won’t work here either.
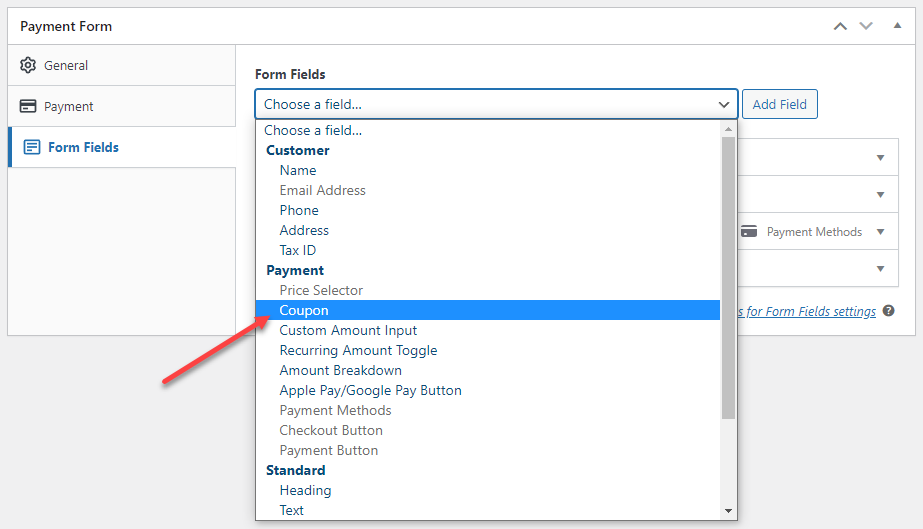
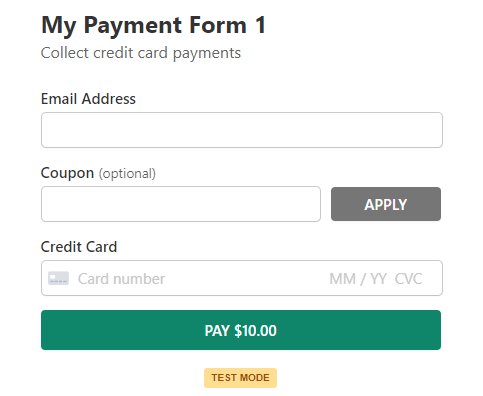
Since we added a coupon code to the exit intent popup, we’ll need to make sure a coupon field exists on the payment form.
While still editing the form, go to the Form Fields tab, select the Coupon field, then click Add Field.
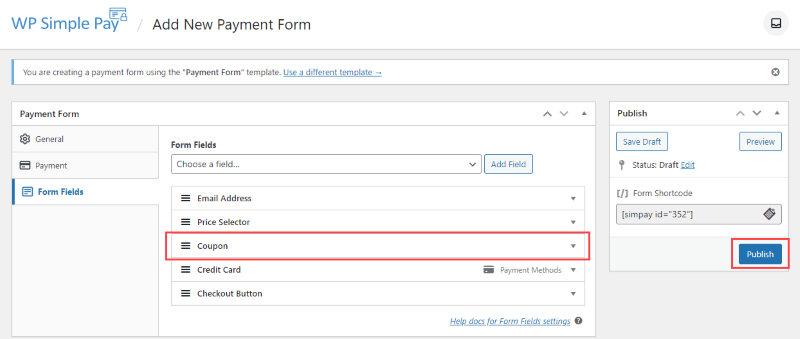
Finally, move the coupon field above the credit card field, then click Publish.
Step 4: Add a Coupon Code to WP Simple Pay and Stripe
When you add a coupon code to WP Simple Pay, it also gets saved to your Stripe account.
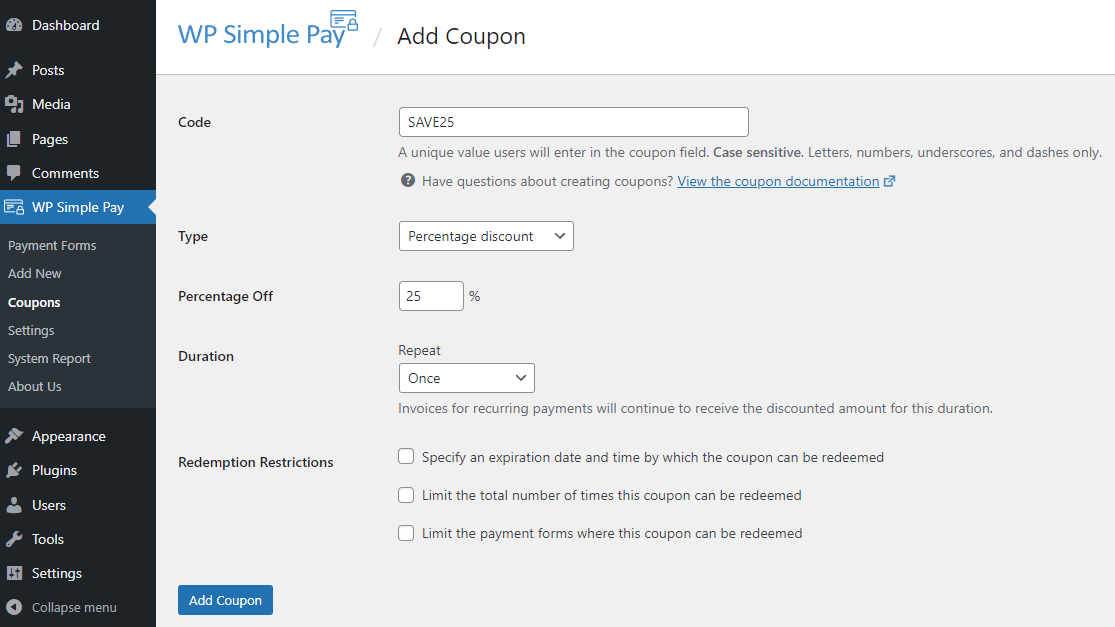
To do this, go to WP Simple Pay » Coupons, then click Add New.
Here we’re just going to add the same 25% off discount code SAVE25 as we used above, so simply fill in the fields as shown in this screenshot, then click Add Coupon.
If you own a WP Simple Pay Plus or higher license, you can also enable coupon codes to work with recurring payments.
Step 5: Add the Payment Form and Exit Intent to a Page
While editing an existing page or after creating a new page, click on the plus (+) sign at the top, find the WP Simple Pay block, then select it to add this block to the WordPress block editor.
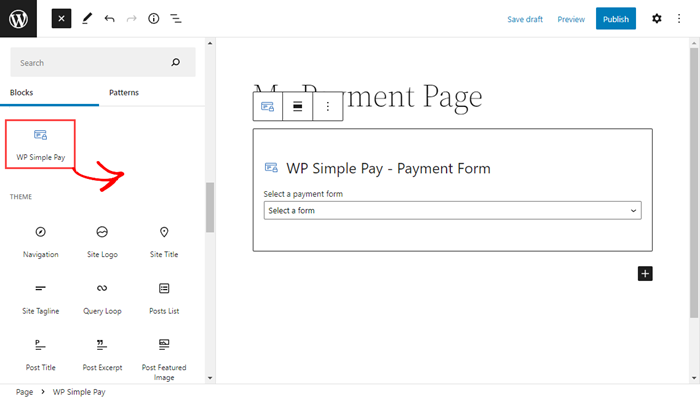
After that, select your payment form from the block’s dropdown menu. Next, you can preview your form, publish it, then visit your page to see it in action.
Now let’s go back to OptinMonster » Campaigns, then click Edit Design under your campaign.
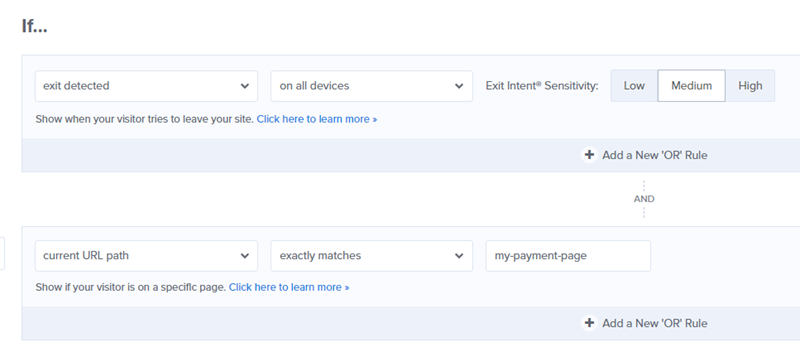
Next, go to Display Rules » Conditions, click the first conditional dropdown, then change it to Exit Intent.
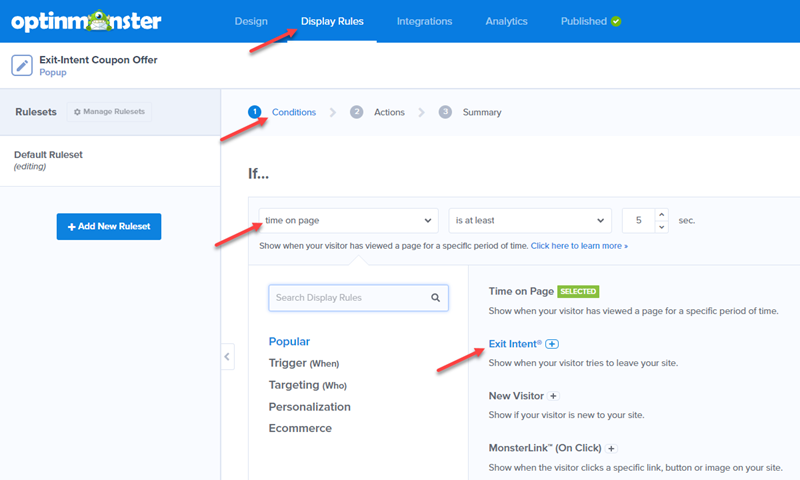
Another option will appear for setting the current URL path. Go ahead and set this to the page URL you’re using for this payment form.
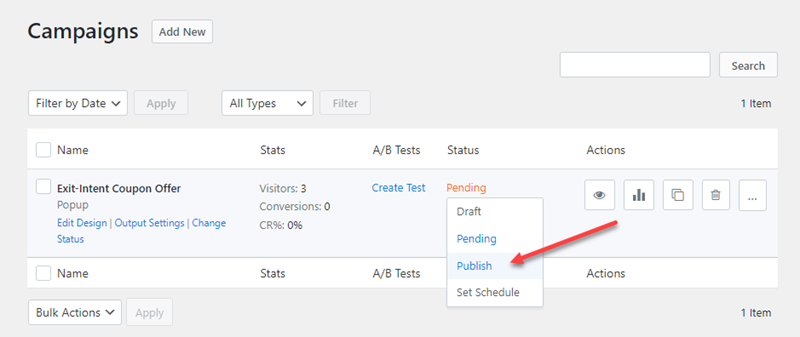
Now click Save, go back to OptinMonster » Campaigns, then click on Pending under “Status” and select Publish.
Finally, open up your page with the payment form and test out moving your mouse outside the browser window. You should now see your coupon code exit intent popup appear!
Recovering Abandoned Checkouts with OptinMonster
Adding exit intent popups to payment forms has been proven to boost conversion rates by reducing abandoned purchases, and as you can see it’s pretty straightforward to set up using OptinMonster paired with WP Simple Pay or other eCommerce software.
We hope this guide helped you learn how to get an exit intent popup with a coupon code up and running quickly and easily.
If you have any questions about using OptinMonster with WP Simple Pay, please reach out to our customer support team here and they’ll be happy to help you out.


Leave a Reply